Business Text Messaging lets you easily create and maintain various contact lists for different user groups. One contact can be assigned to multiple lists, allowing you to segment your customers and send targeted campaigns.
Contact Lists are leveraged in other parts of the application. For example, when you create a campaign, you’ll select which contact list to send it to.
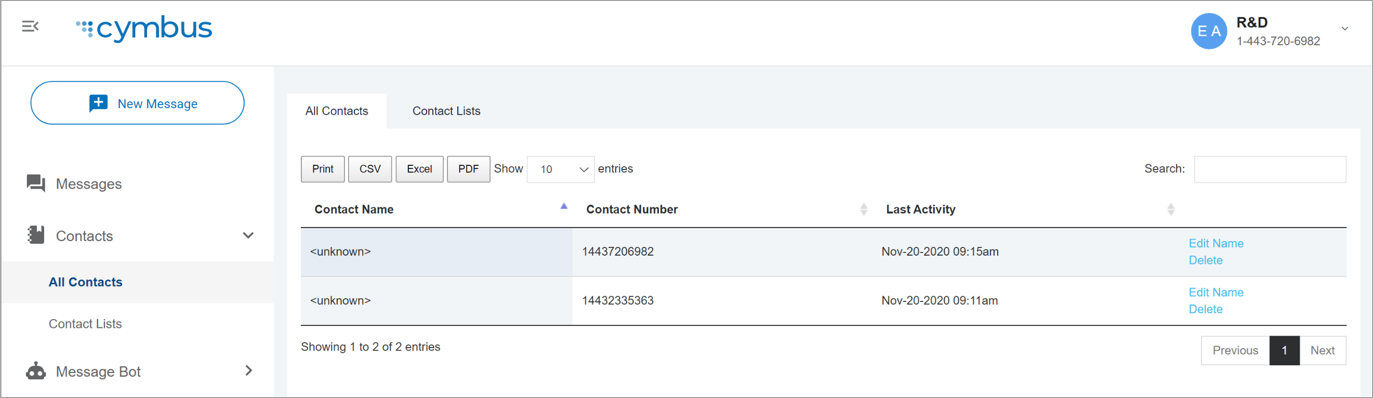
All Contacts
All of your Business Text Messaging contacts, including everyone that sends you a text message, is automatically added to the default All Contacts list. Contacts can be further segmented into other Contact Lists.
View Contact Lists
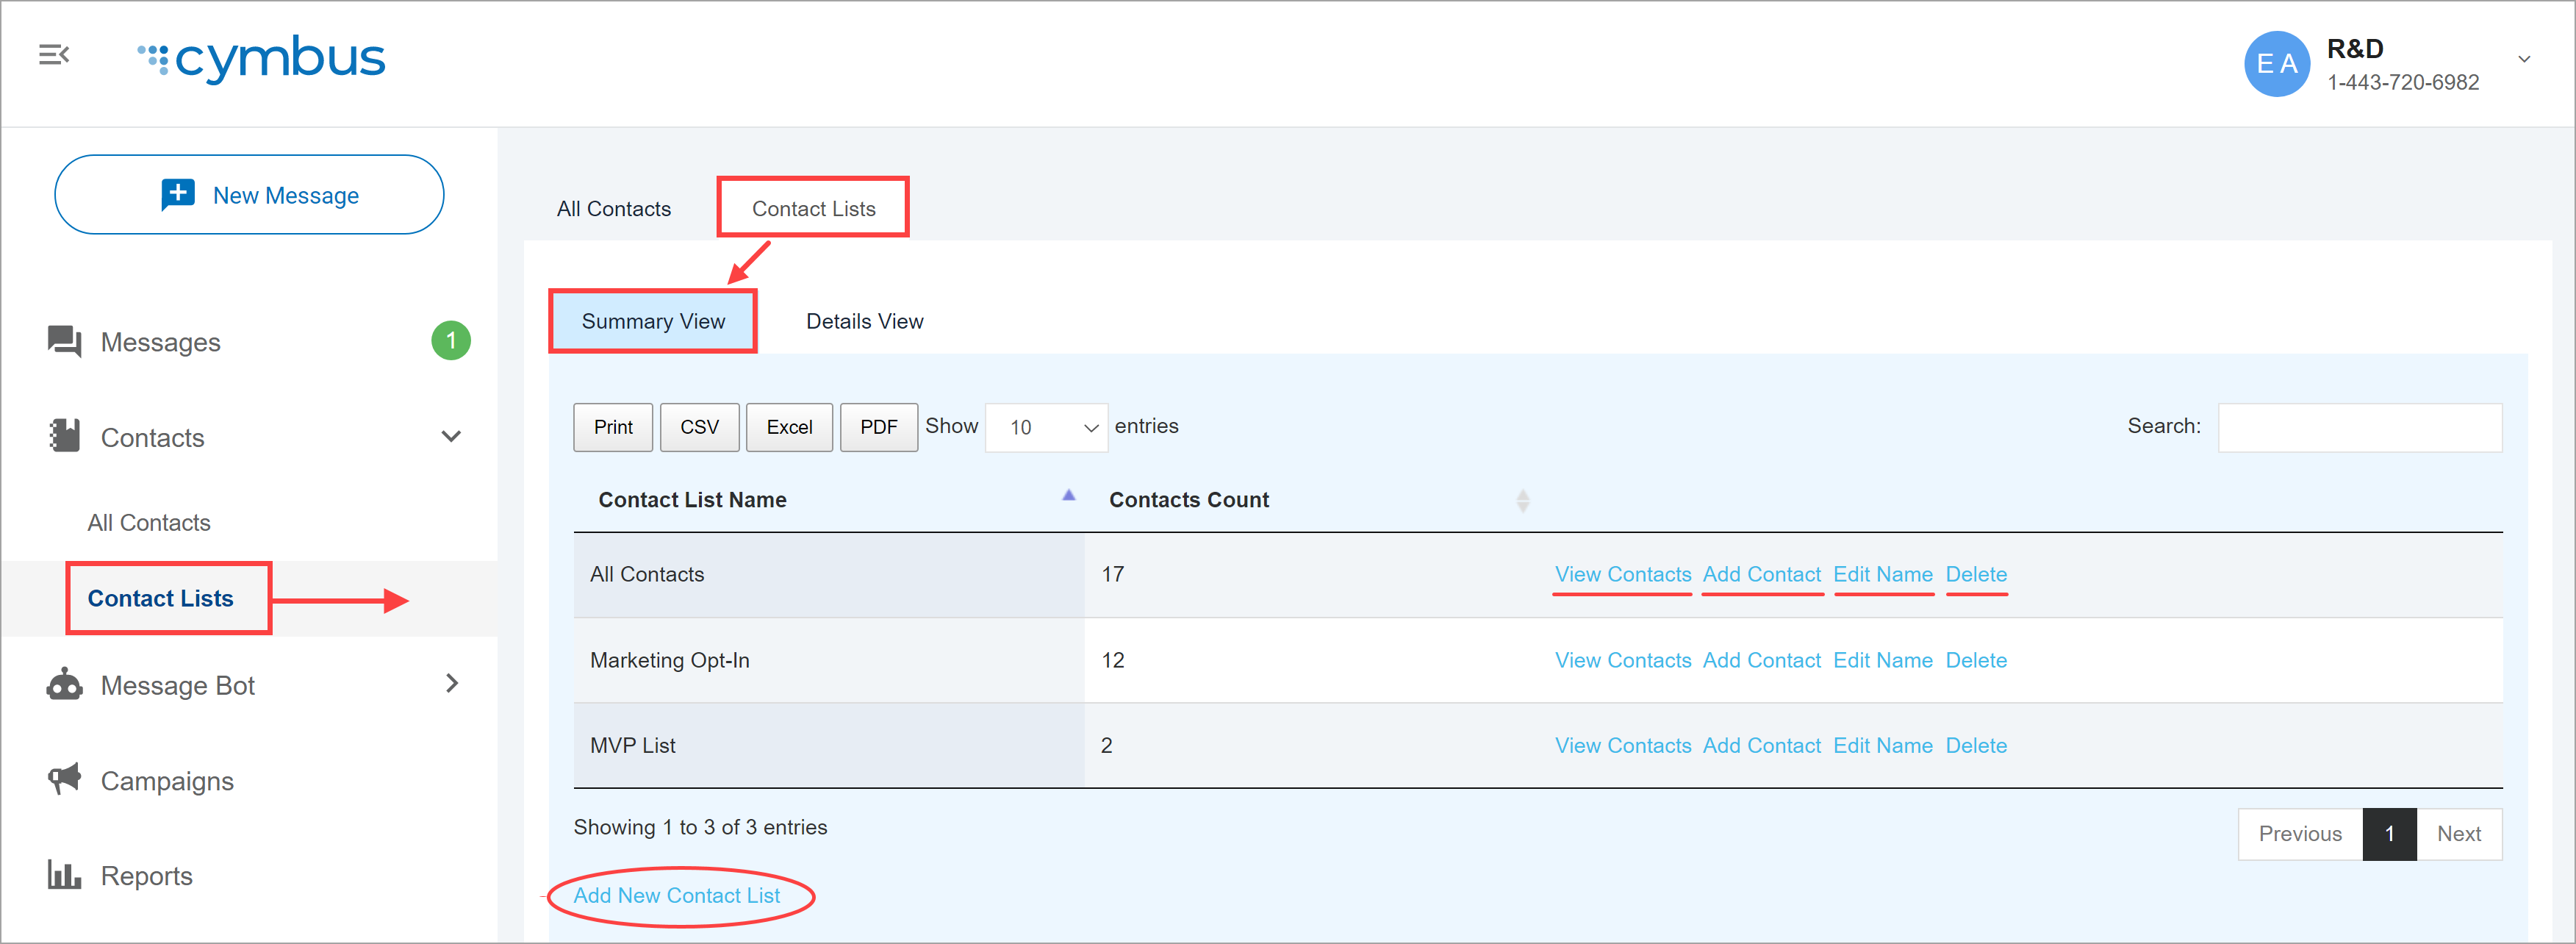
The Summary View tab shows the name of each list and the number of contacts assigned to it, while the Details View tab shows each contact assigned to the selected list. For each list, you can:
- View Contacts. Jump to the Details tab to view a list of the contacts assigned to this list.
- Add New Contact List. Create a new contact list or bulk upload a list from a spreadsheet.
- Edit Name. Change the name of the contact list.
- Delete. Permanently delete the contact list. Individual contacts will still be assigned to the All Contacts
Add New Contact List
Contact lists can and should be created to segment you audiences for a variety of reasons. For compliance reasons, we recommend starting out with “Opted In” and “Opted Out” lists.
- Go to Contacts > Summary View.
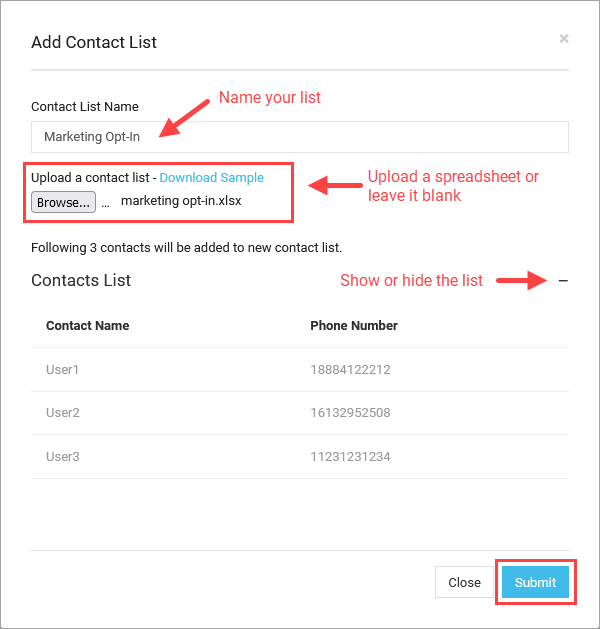
- Click Add New Contact List.
- Give your list a unique name.
- Upload a contact list (below) or skip this step to start with an empty list.
- Click [Submit].
Upload a Contact List
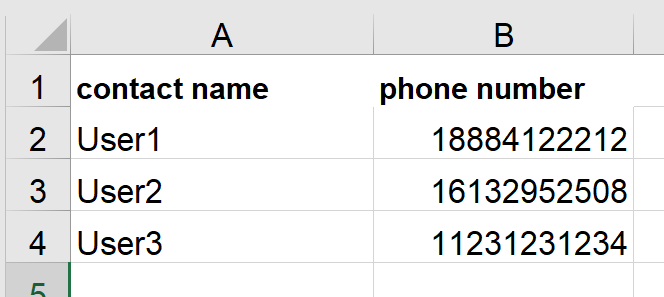
You can bulk upload an existing contact list from an Excel (.xlxs) file with the contact's name in column A and their 10- or 11-digit phone number in column B. All contacts in the file will be added to the new list and the default All Contacts list.
|
|